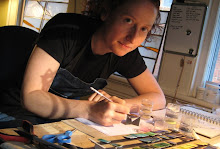
 When I make my wires, I always leave them a little long and trim them as I'm actually putting them in place. A little extra care when laying in your wires will save you grief down the enameling road, I promise. I never start attaching wires at the end of the day, because things tend to get a little sloppy. I have a love/hate relationship with Klyr-Fire. (It's sort of like glue, and holds things in place before you fire them). It supposedly burns off in the kiln, but I've found that it can make the enamels a little discolored or cloudy, so use it in extreme moderation. In fact. I prefer just a little distilled water when I can get away with it. I'll usually attach my wires in two separate firings.
The process itself is very simple:
- I wet the piece with water (and the minutest amount of Klyr-Fire) using a large brush.
- With tweezers, I set the wire in place, allowing surface tension to hold things together.
- Get all the wires in place, keeping things moist, and swearing as needed. (this can be a huge pain in the ass, especially if you've got lots of very little wires- they like to stick together or wander away)
- When it's perfect (and, really, this needs to be the case), the most gentle sifting of clear enamel over the whole thing. Less is more here.
- Dry.
- Fire.
 Here's the Cat and Mouse necklace (I think I'm going to call it "Mon Ami". Maybe.) with the wires all fired in place and ready for some color:


